How to Navigate the Area Measurement Tool on the Property Report
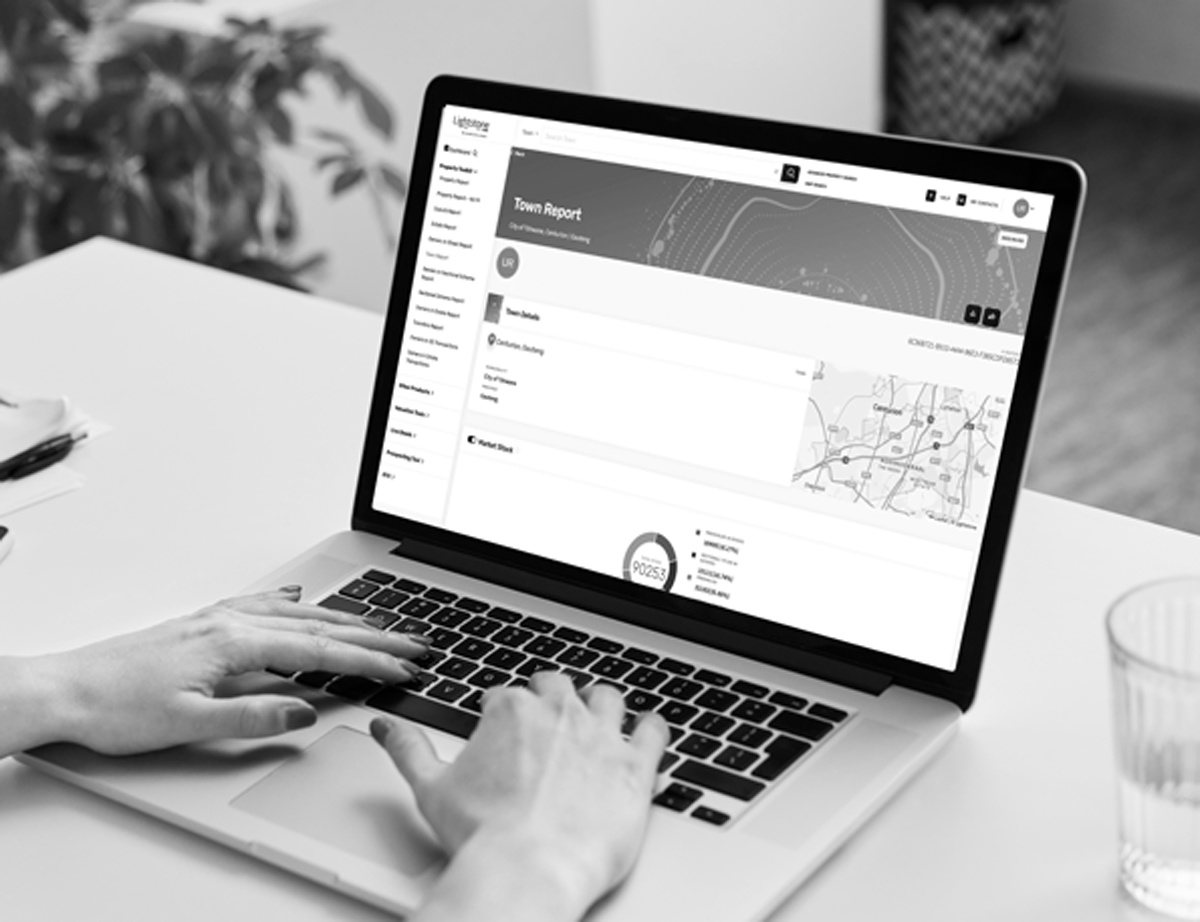
Lightstone’s Property Report includes a handy Area Measurement Tool designed to precisely calculate areas directly from property imagery. Follow these simple steps to utilize this powerful feature effectively:
Step-by-Step Guide
1. Choose Your Imagery Type:
On the bottom right-hand side of the imagery, select between:
-
Street View
-
Satellite View
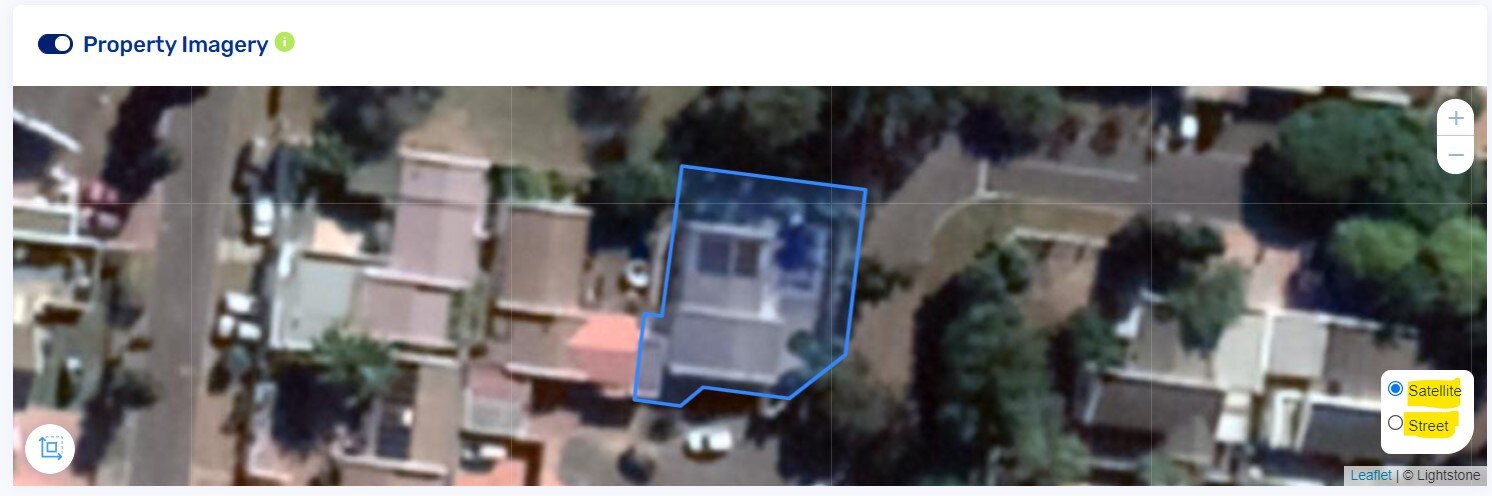
2. Adjust the Zoom Level:
Use the plus (+) or minus (-) buttons on the top right-hand corner of the image to zoom in or out until you reach your desired viewing detail.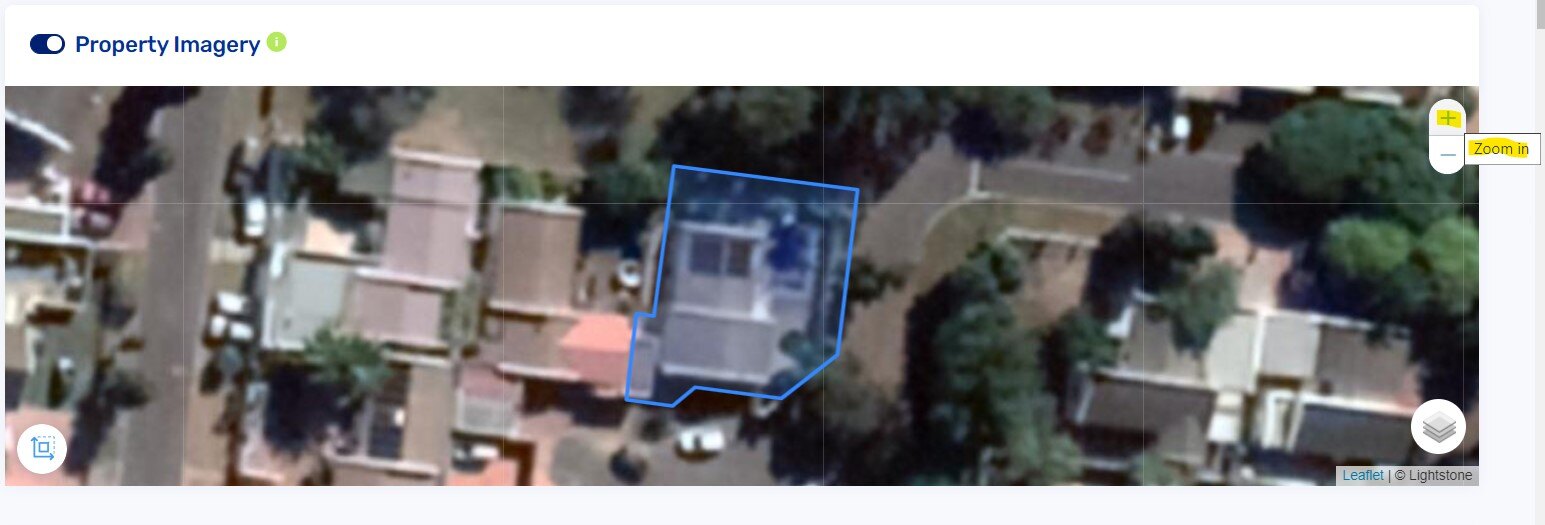
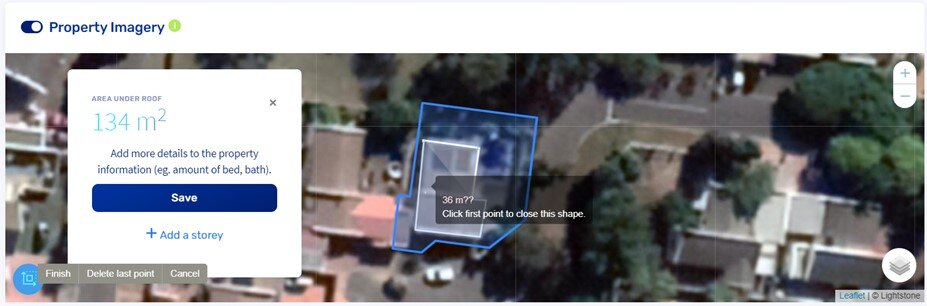
3. Activate the Area Measurement Tool:
Click the Area Measurement Tool located at the bottom left-hand side of the imagery. Your mouse cursor will change into a pen icon, indicating the tool is active.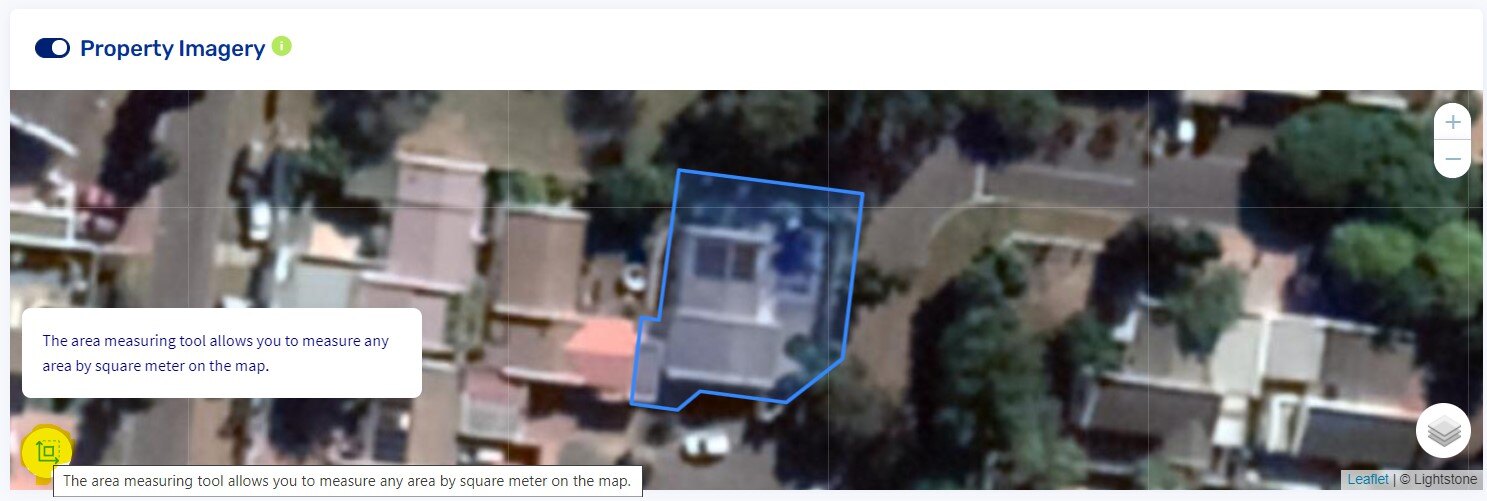
4. Draw Your Polygon:
Click on the corners of the roof or area you wish to measure, moving either clockwise or anti-clockwise. Each click will create a node. Complete your polygon by clicking back on the first node or clicking 'Finish' at the bottom left of the imagery.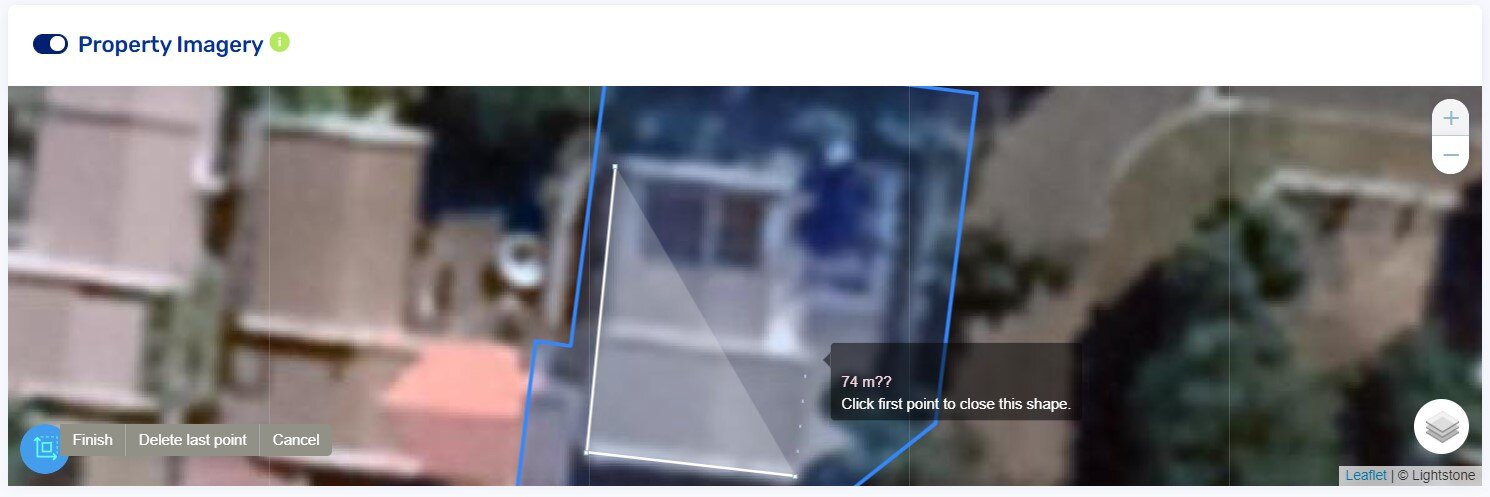
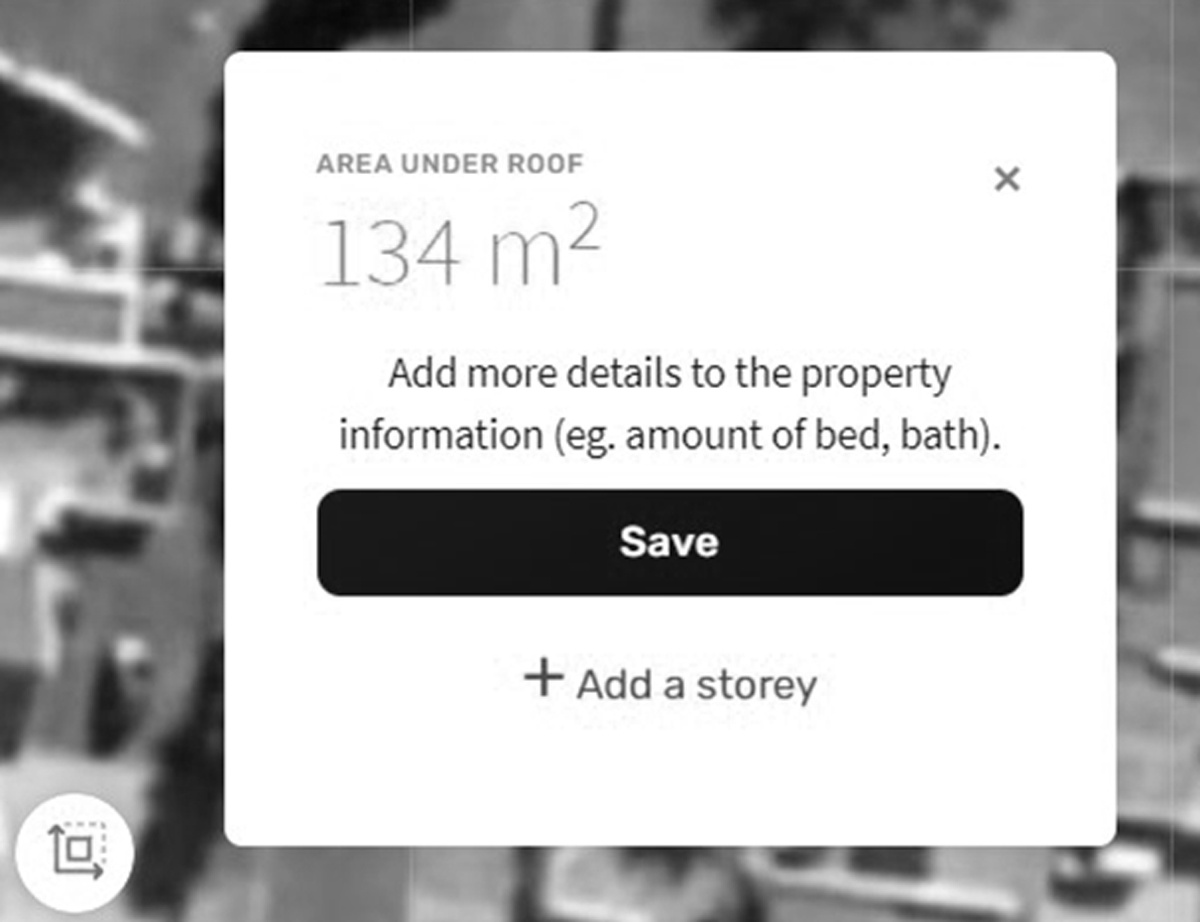
5. Review the Measured Area:
Upon completing the polygon, the measured area under the roof will be displayed in a notification box on the top left, along with options to enhance your measurement.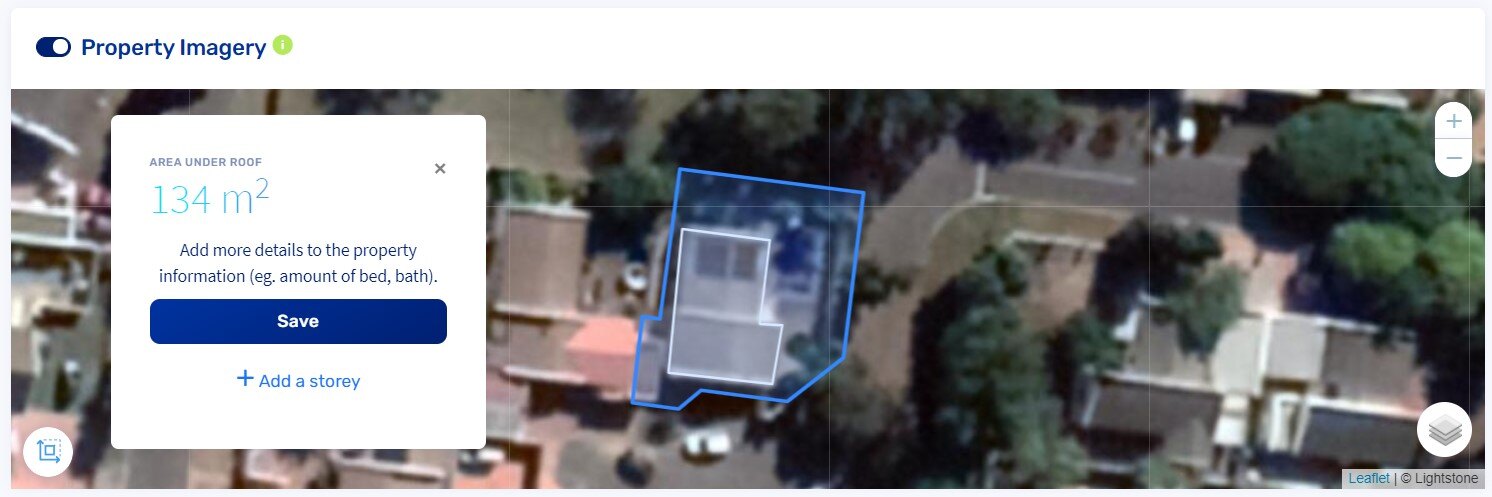
6. Adding Additional Storeys:
To measure multiple storeys:
-
Click '+ Add a storey' in the notification box.
-
Repeat the polygon drawing process for each additional storey.
-
Click 'Finish' after completing each storey.
Your final measurement, including all storeys, will clearly display in the notification box.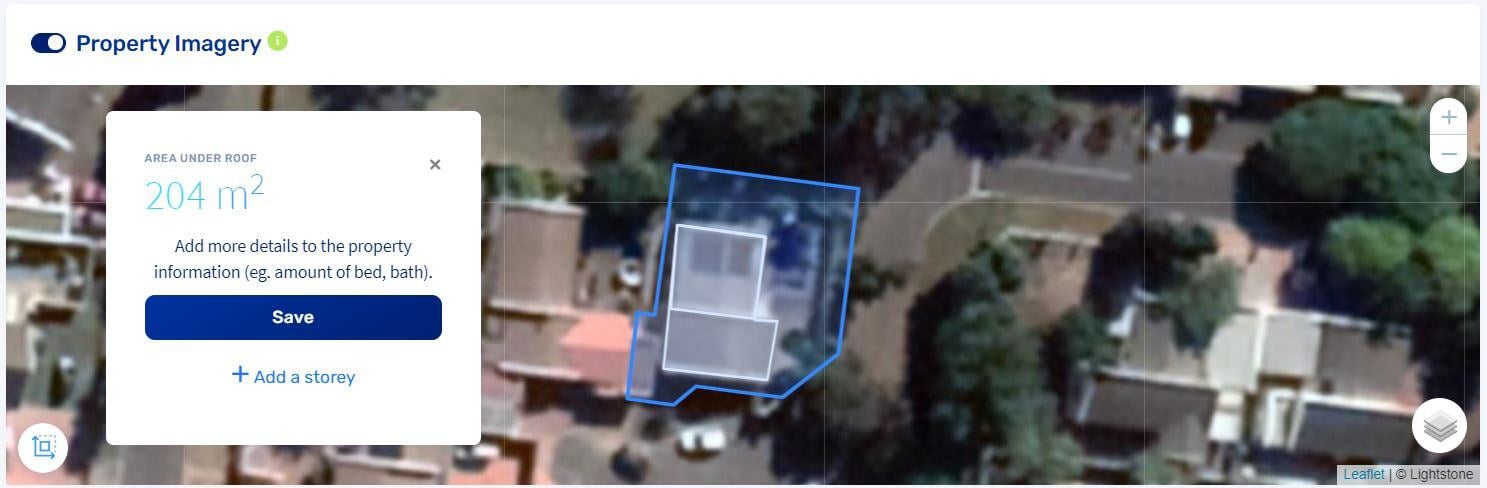
Easily Measure and Enhance Accuracy
Utilising the Area Measurement Tool allows you to quickly and accurately measure property areas, ensuring detailed and precise property evaluations.